Honoring Haiti

Poverty and hunger are not inevitable.

A horrific tragedy hit one of the world’s poorest countries earlier this week and the response has been immediate and abundant. Humanity is at its finest at times like these and dim shouts and ignorant remarks from the fringes have been promptly and firmly tamped down.

Food, medicine, equipment, manpower, shelter, infrastructure—even prayer—are tumbling into Haiti from every corner of the world. As I write this, the small airport there is bulging to the point where flights have been suspended for lack of return fuel and runway space. The help this tragically poor nation deserves comes after a record shattering earthquake that sent a nation teetering on a precipice firmly over the edge. After decades of unimaginable poverty and despair and four previous natural disasters, Haiti is leveled. Haiti is a country in ruin.

The images are gripping, the need dire, the event almost beyond comprehension. I sit here and wonder what I can do beyond sending a few dollars and offering up prayers. How can I make a difference to honor Haiti’s millions of sad, desperate, proud souls.

In the midst of all this a memory struck me after a Facebook friend commented that he couldn’t focus to work; he was so gripped by Haiti’s plight.

Decades ago a group of aid workers (in Africa) hit on an idea that was so simple and so effective you might wonder why no one thought of it before. The village they were working in was devastated by poverty and by hunger; locals were wholly dependent on a corrupt and unreliable system for food and for sustenance.

The lives of these villagers were dramatically changed when they were taught to farm, rotate crops, irrigate. They were encouraged to coop what they grew and to carry their extra crop to a city market several times a year. The farms also afforded them the opportunity to (eventually) grow feed for animals that in turn gave them milk, eggs, meat.

A few cents worth of seed and some dedicated men and women sharing their expertise can change the world….one small village at a time.  The extended benefits of a healthy populace is immeasurable and it is with this that I am refocusing.

Hunger is a misery and a poverty that cuts the souls, ruins the heart and destroys the body. But it is not inevitable and I—we—-can do something about it. Pick one thing. Do it. Encourage everyone you know to do the same. “Light one little candle…”

Improve food supplies

  • Plant home, community and school gardens
  • Find ways, neighborhood permitting, to raise poultry for eggs to eat or sell
  • Become involved in co-operative efforts to grow and sell foods
  • Support local farmers; buy locally grown foods
  • Establish centers or food banks to share food.

Help others

  • Volunteer to work for hunger issues;
  • Volunteer to work in food or meal distribution centers
  • Establish food centers or food banks to share extra food
  • Work with the local food industry to redistribute surplus food
  • Invite commercial food growers and producers to participate

Education, the Community and Sharing

  • Know who in the community is working to fight hunger, listen to them, and share ideas with them, support them
  • Know who in the community has knowledge about health and nutrition, listen to them, and share ideas with them
  • Share information with families, friends and neighbors
  • Share school projects and post reports in community spaces
  • Share ideas wit community leaders, politicians
  • Urge community leaders, business leaders, local health workers, educators… to become involved with school projects around issues of hunger and nutrition.
http://www.georgiaorganics.org/

http://www.heifer.org/

Leave a comment »

4 The 1’s I Love

 Several weeks ago I received an email from one of my sons’ childhood friends. She was commenting on her mother’s cooking and I was enjoying this new perspective on a woman who I had long held in high esteem and viewed with admiration. (Her mother is a brilliant sculptor with works in the permanent collections of several of the world’s major museums).

She wrote, “My mom made macaroni and cheese with Mueller’s corkscrew pasta- and the cheese was Campbell’s cheddar cheese soup, condensed.  At least that’s all I remember-  there might have been other magical ingredients, but I don’t think so. well- butter.  lots of butter.  the macaroni was passable- but her meatloaf was DREADFUL. Image of: mom’s hands mixing raw hamburger meat, raw eggs, Lawry’s crazy Salt (sp?)  oatmeal and ketchup together in a big orange bowl.  Yuck

The idea of this woman, whose talented hands created life sized bronzes for the Tate and the Hirshhorn, squishing meatloaf between her fingers, sent me into gales of laughter. How our children view us! I wondered what my sons thought about my cooking (when they were young) and  I fired off notes asking what they remembered.

                     From #1 son:

Of course, the first good food things that come to mind are Chicken with Cashews and Tuna casserole.

The two not-so-good things are Salmon croquettes, and of course, the frozen salmon itself.

Mom, those croquettes (and the pork chops, now that I think about it) were so dry, you could have used them as sandpaper. I never wanted to hurt your feelings, though, since you always looked so pleased when you announced the dinner menu on those fateful nights… No wonder that I don’t eat salmon at all??”

I’m adding a note on the frozen salmon (since #1 son diplomatically omitted why he added that to his list): I had pulled a large piece from the freezer to defrost for dinner. Shortly after there was a need to grab something in an attempt to level discipline and the frozen salmon was handy. I swung and made good contact with a fleeing tush. Later the salmon was cooked and served. Like O’Henry wrote, the evidence was consumed and the injured party was not to be believed when he complained about “being beaten with frozen fish”

                    From #2 son:

Corn fritters.

Corn fritters.

Corn fritters.

And also, corn fritters.

One time when you were living in Bedford Hills I came over for lunch and you made homemade mayonnaise to mix in my tuna sandwich. I thought then and still think that stuff is gross, but I was still impressed you knew how to make your own. 🙂

Later on #2 son added silver dollar pancakes (as something he liked).  After reading their remarks I realized,  I should have left well enough alone.

Stu’s Chicken with Cashews

Serves 8

  • 3 ½ lbs boneless, skinless chicken breasts
  • 2 TBS cornstarch
  • 6 scallions, white and green part, sliced thin
  • 1 4oz can water chestnuts, sliced thin
  • 3 large cloves of garlic, minced
  • ½ LB salted cashews
  • S&P to taste
  • 4 TBS Peanut oil + more for cooking

Method:

  • Cut chicken into 1” pieces (partially frozen chicken is easier to cut)
  • Pat dry and put the pieces in a bowl. Season with S&P.
  • Add the cornstarch and mix well, making sure all pieces are well coated. Dust with more cornstarch if needed
  • Add the 4 tablespoons of peanut oil and mix well.
  • Heat a heavy duty sauté pan or wok over medium high heat. Add peanut oil to 1”. When the oil “shimmers”—is hot—add the chicken and stir fry until light golden brown and just cooked. Do not crowd the pan. Do this in batches if necessary.
  • Remove the cooked chicken pieces to a strainer to drain and set aside.
  • Pour off the old oil, reheat the pan over medium heat and add enough fresh oil to lightly coat the bottom of the pan. Add the water chestnuts and sauté for one minute.
  • Add the garlic and sauté until the garlic is softened, about 2 minutes.
  • Add the cashews and sauté an additional minute.
  • Return the chicken to the pan, mix in the scallions and cook just to reheat the chicken, about 1-2 minutes.
  • Check seasonings and serve immediately over white rice

 Cory’s Corn Fritters

Serves 4

  • 1 1# can of corn, well drained
  • 1 large egg, well beaten
  • 2 TBS whole milk
  • 3 TBS flour
  • ½ tsp baking powder
  • Salt and black pepper to taste
  • Optional: pinch cayenne

 Method

  • Mix all ingredients together, cover loosely and let sit for 10 minutes
  • Heat a heavy duty pan over medium heat, and coat with ½ ” vegetable or canola oil.
  • Drop the mix by soup spoon full carefully into the hot oil to form small cakes about 3” around
  • fry until golden brown on both sides.
  • Drain on paper towels and serve hot

Comments (2) »

The Daddy Snack

 Paper towel sandwiches. There’s something I hadn’t thought about for a whole lot of years. The subject came up Thanksgiving evening as we all lolled after dinner, feeling the tired as the tryptophan kicked in. We were musing about past Thanksgivings and ways to use the leftover food when a memory of Daddy popped out of my mouth. “Paper Towel sandwiches,” I giggled, “That’s what Daddy used to do.” 

I felt five pairs of eyes swing in my direction, all staring with a single look of confusion; perhaps also thinking I might cut back on the wine.

“What are you talking about? That sounds just awful.” I suppose the image of paper towels as a filling for a sandwich or a substitute for bread was rolling in their heads; not the exact idea I had intended to convey. I’d regressed for a moment, forgetting where I was. My family would have known the minute I spoke that phrase, my post Daddy friends would need an explanation.

Daddy was as famous for his sandwiches as the way he chose to eat them and the way they were prepared. His process was distinctive, unwavering and, as I close my eyes to remember, sheer pleasure to recall.

Well after dinner was over, dishes cleared and counter wiped, Daddy would wander into the kitchen. If the lights were dimmed, he wouldn’t raise them. You’d hear the rip of one sheet of paper towel leave the roll. Then the distinctive sound of the refrigerator opening and closing. After that, nothing for several minutes as he worked his magic, he was a quiet man, My Daddy. But then you’d look up and there he’d be…..holding it…that concoction of leftovers stuffed between 2 slices of bread (or a roll if there were any).

The concoction he put together using his fingers (a utensil only if mayo or mustard were required) was easily 3 inches thick and always had one bite missing by the time he reappeared; the bite taken the minute his preparation was complete; a giant bite worthy of a large man who always dug heartily into his food. And wrapped around all of this sandwich magnificence was always a single square of paper towel with its ends and sides carefully cupped up ward: the better to catch any stray crumb or morsel of food that might have the temerity to dare to escape.  The Paper Towel sandwich was in the room and Daddy always finished it with a sigh.

Comments (2) »

Remembering Nana

Nana’s kitchen was a long skinny room with the doorway at one narrow end and a window at the other. Down one long wall, going from door end to window, was a metal pantry cabinet with tall narrow doors, a fridge no taller than she was (all 5’ and nothing), a small enamel table and a gas stove with four burners. Across, on the other long wall, going from window back to door, was a porcelain sink with built in drain board, a length of counter and another metal pantry; the same size and look as the other. White metal cabinets topped the sink and the counters all as tall as the 10-foot ceiling.

To walk into my Nana’s house meant encountering her kitchen and the smells that it held the minute you got through the door. Many coursed feasts were prepared in the narrow bright space feeding upwards of 12 or 15. As a young child and then all through my life, I have never stopped marveling at the wonderful food Nana turned out of that cramped and tiny place.

Cooking was effortless for her and every square inch of kitchen was used. There wasn’t a Cuisinart, a blender, or an island for prep. She didn’t own or ever know about non stick.  There certainly wasn’t a dishwasher (if you didn’t count me, my cousin or my sister). The internet, for tips, guidance or how to, was not yet developed.  Recipes were kept in her head and measuring was by eye and by tea cup.

With limited storage and a tiny fridge, shopping was done daily and she walked to the store. Along the streets of Brooklyn there was little parking for cars and an SUV was unheard of. Ladies owned gridded metal shopping carts, narrow and deep with wheels on the bottom and plastic liners in case of rain. Stopping at grocery, bakery, fish store then butcher, Nana collected all that she needed. If the load was too much the store could deliver. No charge for the service, no concern it would show up. No plastic bags then, produce was loose in a bin, fish and meat were sent home wrapped in brown paper.

Back in the kitchen the magic began. Quenelles of fish were prepared, the fish minced and chopped by hand (in a huge wooden bowl) to a silky even fineness no processor could accomplish. Spices were whole and pulverized with a mortar and a pestle. Chicken was roasted to juicy fall-off-the-bone perfection and there wasn’t an instant read in sight; doneness checked by touch and by smell. Her soups, nectar of the Gods, I swear! They’d simmer for hours in a tall enamel pot and when served, not a drop of grease in sight; the skimming accomplished with patience, an old thin towel and a strainer.

Cakes were made from scratch, whites whisked by hand and pans were greased with the paper that wrapped the butter. No sprays from an aerosol can. No mixes from a box. Nuts were chopped in a small glass jar with a four sided blade that went up and down with hand power. And bread…all kneaded with patient muscle on the low enamel table. No bread machine, no dough hook, no pre-measured yeast. Yeast was a cake and you just knew how much.

Things have changed a great deal since Nana cooked and drank tea in her skinny white kitchen. I wonder sometimes if she would approve. I know she enjoyed how the world was changing; she cheered when man reached the moon. But would she appreciate how much we depend on our machines and our gadgets instead of on skill, love and patience. Long simmering pots are not often seen these days. Fast, easy and microwave have taken their place.

I do wonder sometimes, I do wonder a lot. Have we, with our drawers full of gadgets, equipment jammed counters and food plastic wrapped, ready to heat, serve, eat, lost something meaningful along the way?

Nana’s Chicken Soup

  • 1 whole 3-4 pound chicken, washed and patted dry (Kosher or Free Range-Organic)
  • 1 onion, peeled and cut in ¼’s
  • 1 stalk celery, leaves on, cut in ½
  • 1 parsnip, peeled and cut in ½
  • 1 leek, light green included, well cleaned, cut in ½
  • 6-8 carrots, peeled and cut in 1½ ” to 2” lengths
  • ½  bunch fresh dill (no stems)
  • ¼  bunch flat leaf parsley (no stems)
  • Seasonings: salt, pepper, garlic powder, dry thyme, paprika, dry dill weed: all to taste

Method:

Fit the chicken in the bottom of a heavy stockpot. The chicken should fit rather snugly on the bottom. There should be no more than 1”-2” of space from the side of the pot to the chicken. Fill the pot with enough cold water to top the chicken by about 4”.

Add the seasonings to the water; season lightly in the beginning. The cold water will deaden taste. You can add more seasonings later if necessary. Loosely cover the pot and bring it to a boil. Turn the light down and keep the heat at a very gentle boil for 1 hour. The water should just be barely bubbling.  

After one hour, re-check and adjust your seasonings. Add all of the vegetables, bring the broth back up to a boil and continue gently boiling for another 2 hours. (Loosely covered). Turn off the heat, adjust the seasonings if necessary and let the soup cool for ½ hour.

Remove the chicken from the pot and put aside. Strain the balance of the soup, saving the vegetables. Pick out all but 2 of the carrot pieces from the vegetables and set the carrots aside with the chicken.

Add all of the remaining vegetables to the bowl of a food processor and puree until smooth. If necessary, add 2-3 TBS. of the soup to the vegetables to make the processing easier. (Nana would use a Foley mill. If you have one, use it and process the cooked vegetables that way. The resulting texture is much better)

Scoop the pureed vegetables back into the soup, stir, cover and chill overnight.

The next day, skim all of the congealed fat from the top of the soup and discard.

This soup will keep in the refrigerator for 3-4 days. It also freezes very well. Make sure, if you’re dividing it into smaller containers, that it’s well mixed so there are equal amounts of the puree in each batch.

Serve hot with the carrots and some of the boiled chicken.

Comments (4) »

Lights and Latkes

Today was the first day of Chanukah, the Festival of Lights and Latkes.

The story of Chanukah begins with the Maccabees, a Jewish warrior family dating from Biblical times. After fighting a long war with the Syrians, the Maccabees returned home to Jerusalem to find their Temple vandalized. They cleared the mess, rebuilt the altar and went to light the sacred Menorah—candelabra.  Consecrated pure olive oil was required for the lighting but only one day’s supply was available. Miraculously the one day supply lasted long enough—-eight days—for a new supply to arrive.

To celebrate and commemorate the miracle of the oil, Jews around the world light candles in an eight armed Menorah for eight nights—starting with one candle and adding one more each night until all eight are lit—and serve traditional foods that are fried in oil.

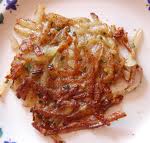
In the US, the Latke has come to symbolize Chanukah food more than anything else. Simply put it is a potato pancake shallow-fried in vegetable oil and served with applesauce or sour cream. It is not a complicated dish and should only be made with grated potatoes, grated onion, whole eggs, matzo meal, salt and pepper.

While the Latke is admittedly a delicious and well known version of the fried potato cake, it is not the only way to peel, grate and fry a potato.

The Swedes have given us Rarakor—a lacy version made with chives and served with ligonberry jamand the Irish enjoy Boxty-–finely grated and mashed potatoes mixed with flour.

Sephardic Jews (Jews originating from Spain) serve ejjeh batata for Chanukah: fried potato fritters served in Pita bread with tomatoes, pickled cabbage, cauliflower and cucumber. In Germany baking powder is added and they are called Kartoffelpuffer. Belarus tops all by making the potato pancake their national dish.

I wanted to try an assortment of these wonderful grated potato concoctions to celebrate my (quiet) first day of Chanukah. I’ve been pulling cookbooks from around the world for days now while Google search has been on overdrive. However, like most traditional foods, an “original” recipe was hard to find. I’ve cherry picked from several to come up with what I thought was the best version of each.

There is one thing, however, that all the old, traditional recipes have in common: you must use starchy, russet potatoes and modern gadgets do not turn out the best results. Give up the food processor, put in a little extra effort and shred your potatoes on a box grater. (Have band-aids handy…your knuckles will take a beating).

Sweden: Rarakor med Graslok (lacy potato cakes with chives)

To serve 4

  • 4 medium potatoes, peeled
  • 2 TBS minced fresh chives
  • 2 Tsp kosher salt
  • Freshly ground black pepper to taste
  • 2 TBS unsalted butter
  • 2 TB S vegetable oil

Method:

Have everything prepared and measured—mis en place—and work quickly so the potatoes do not discolor

  • Peel the potatoes and shred them by hand with a box grater into a bowl. Do not drain off any potato liquid that accumulates.
  • Stir in the chives, salt and pepper.
  • Heat the butter and oil in a shallow 10-12 inch pan over medium high heat.
  • When the foam subsides, drop in 2 TBS of mixture for each cake and flatten each with a spatula. They should be about 3” in diameter
  • Fry 3-4 at a time, 2-3 minutes a side, until golden brown and crispy.
  • Drain on paper towels and serve immediately with ligonberry jam on the side

Note: these lovely potato cakes are almost translucent when they are done.

Germany: Kartoffelpuffer mit Apfelmus (potato fritter with applesauce)

To serve 4

  • 2 LBs potatoes, peeled and soaking in ice water
  • 1 medium yellow onion
  • 2 tsp kosher salt
  • Freshly ground black pepper to taste
  • 1/8 tsp freshly ground nutmeg
  • 2 large eggs, beaten
  • 1 tsp baking powder
  • Vegetable oil for frying

Method:

  • Pat the potatoes dry and grate them over a clean dish towel or triple thick piece of cheesecloth
  • Wrap up the grated potatoes and squeeze out as much liquid as possible into a clean bowl
  • Let the potato liquid stand for 5-10 minutes
  • Put the squeezed grated potatoes into another bowl.
  • Grate the onion over the grated potatoes
  • Add the salt, pepper, nutmeg, eggs and mix well.
  • Carefully drain off the reserved liquid from the potatoes until you come to the white potato starch that has settled on the bottom. Scrape the starch into the potato mixture and mix well.
  • Heat a large (non stick if you have it) pan over medium heat and add about ¼” vegetable oil.
  • Using a ½ cup measure, drop the potato mix into the hot oil and flatten gently with the back of a spoon.
  • Fry 4-5 minutes on each side until golden brown.
  • Drain on paper towels and serve with applesauce and a sprinkle of cinnamon

Nana’s Latkes (traditional potato pancakes)

To serve 4-6

  • 4 medium potatoes
  • 2 medium yellow onions
  • 2 large eggs, beaten
  • 2 tsps kosher salt
  • Freshly ground black pepper to taste
  • 2 TBS matzo meal
  • Vegetable oil for frying

Method:

  • Peel the potatoes and grate them into a large bowl
  • Peel the onions and grate them into the same bowl with the potatoes (you may want to alternate grating potato and onion to keep tears at bay)
  • Mix in the matzo meal, salt and pepper
  • Swipe your index finger lightly over the mix and check the seasonings, adjust if needed
  • Add the eggs and mix well
  • Heat ¼ “ of vegetable oil in a large shallow pan over medium heat
  • Test the oil: take one piece of shredded potato and toss it into the oil. If it “sizzles” the oil is ready
  • Using a large soup spoon, ladle the potato mix into the oil and flatten each gently with the back of the spoon. Each latke should be about a 3”x2” oval and about ¼ “ thick. Fry the latkes, turning only once, until golden brown on both sides.
  • Drain on paper towels and serve with applesauce or sour cream.

Note: if you are making dozens and dozens like we do this time of the year, keep the latkes warm by placing them, after they’re well drained of oil, on a rack set over a cookie sheet in a 200° oven. They will keep for about 30 minutes.


Comments (2) »

Berry Good

We ate cranberries today. Everyone in America ate cranberries today. Anyway, mostly everyone ate them. There may be one or two out there who won’t even take a bite but Thanksgiving is not Thanksgiving without some kind of cranberry concoction gracing the harvest table.

I wonder about cranberries. I’d like to meet the first person who looked at a squatty bush and decided that the berry it held might be something good to eat. What did they think when they took that first bite?

“Oh yikes, this is too sour! Maybe we should mix lots of them with handfuls of sugar and boil the whole mess until the berries burst. Then they’ll certainly be good to eat.” 

And what about that sugar? Did they have sugar hundreds, maybe thousands, of years ago? I don’t think they did, not in the wilds of what we know as New England…..or anyway, not the refined sugar we enjoy today. What did they have to make that sour berry sweet? Did that person then look at the tall tree with the yellow leaves and think, “Aha! I bet that tree has something for my cranberries. I’ll just drill a hole in the bark, hang a pail and let the juice from the pulp drip out.”

Hmm, I wonder…..Nope. That’s not the answer. Someone did grab one of those little guys and take a tentative first bite. Who it was and when, we just don’t know. But we do know it is a food uniquely American and the first taste had to happen here.

Cranberries are native to the Americas, specifically the Northeast, were eaten by Native Americans and those indigenous people did introduce the berry to the newly arrived Europeans. But the cranberry relish we eat today is not how the Pilgrims used this food. Instead, the early settlers took their new cranberry friend (which they called craneberry) and mixed them into stews—most likely venison, game and squash—-and fire-roasted breads, much like their helpful Wampanoag neighbors.

It would take another two hundred years, when the cranberry went into commercial production and refined sugar was easy to get, for the cranberry to turn into the jellied, canned, orange flavored bowl of wiggly sweet goodness we all ate today.

Now, I have to add, the Pilgrims did not have Thanksgiving. They did eat with Squanto and some of his tribesman after their first harvest because the Native Americans came bearing game. They dined together several times over a period of days. But it was certainly no celebration. The stuffy Puritans weren’t into holidays or anything festive and had even quit doing anything special for Christmas or Easter other than going to church.

The earliest attested Thanksgiving in America was instead at St. Augustine, Florida in 1565. The first officially proclaimed Thanksgiving was celebrated by English settlers at Berkley Plantation, Virginia in 1619 (a full two years before the Plymouth settlers, who eventually disappeared). The Charter of Berkeley Plantation specified the Thanksgiving service: “Wee ordaine that the day of our ships arrival at the place assigned for plantacon in the land of Virginia shall be yearly and perpetually keept holy as a day of Thanksgiving to Almighty God.”

Ordained, certified and official, the earliest tables most like had sweet potatoes, probably a roasted wild turkey, definitely lots of beer. There were definitely no cranberries. It was too far south.

Mother’s Cranberry Relish

1  12 ounce bag of fresh cranberries

¾ cup of sugar

¾ cup of water

1 cinnamon stick

1 small orange cut into bite size pieces, skin left on, stem removed

½ cup roughly chopped walnuts or pecans

 Method

  • Put cranberries, sugar, water and cinnamon stick into a deep pot
  • Stir to combine
  • Set over medium high heat and bring to a gentle boil
  • Lower heat and boil gently (uncovered) until the berries burst
  • Remove from the heat and stir in the nuts and orange
  • Cool to room temperature, then remove cinnamon stick.
  • Cover and refrigerate overnight or until set

Leave a comment »

Fowl

The chicken sat there on the platter shedding its skin like some evil snake, daring me to put it on the table. After all, I had made a great deal about its preparation: buying buttermilk, doing a 24-hour soak, mixing up a special coating. What was I gonna do now? Say it was a disaster or suck it up and serve?

I sucked it up. I served. I watched everyone as they ate. Compliments abounded. I was not at all pleased. Besides the molting crust, the bird on my plate was dry, not juicy and full of flavor. If I were a Top Chef contestant Padma would be telling me to pack my knives and go home. Instead, I chewed….not sitting up proud basking in success but slumped in my chair wondering what I had done to displease the elusive Fried Chicken God.

It all started innocently enough while The Visit was being planned. The expected phone call had come. The expected question was asked, “What was I planning to cook while I was there?” I gave the usual answer, “What do you want me to make?”

It’s a tradition we have, Best Friend’s Husband and I. He likes to eat. I like to cook. We know that about each other. He throws out menus. I get excited. I happily pack my knives. For aside from the fact that I enjoy time with Best Friend, I also relish Husband’s culinary challenge. “What will he want me to prepare this time? Can I pull it off?” I was smug. Of course!

Best Friend? Well, she usually just looks on; she frequently seems amused. She wisely leaves us alone.

Southern Fried Chicken was the first night’s order (with a double crusty crust). I skewed up my courage and cooked.   The Gods weren’t with me. You know the sad results. My smug had melted away.

So what is the key to yummy fried fowl?  

“The Key to Fried Chicken”, I am being told, “is in the oil, the pan that you use and a bird that is DRY before it goes in to fry.”  “Aha”, I answer, still feeling confused. “I did use hot oil, I floured my fowl and the pan was brand new non stick.”

“You don’t understand.” My friend explains with great patience. “Do flour your fowl, but then let it rest. Fifteen minutes should do it. But not too much more. The fat should start solid, use the stuff from a can. Let it melt slowly, then raise the heat. And please, fry with a pan that’s heavy. The best is cast iron….well seasoned, well used.” 

Did someone once sing about dawn’s early light and wow, was I ever there. I learned…again, Basic Cooking 101. Read directions, follow directions, do not think you know it all. Learn from errors. Move On.

Very Good Fried Green Tomatoes

(use a cast iron skillet, start with the fat that comes in a can, melt it slowly to a depth of 1”, bring heat up to 350° before frying)

  • 4 large green tomatoes, cored and sliced ½ inch thick
  • 1 cup all purpose flour
  • 1 cup cornmeal
  • 1 cup of butter milk seasoned with hot sauce (to taste), S&P
  • 1 TBS garlic powder
  • ½ Tsp dried thyme
  • Dash of cayenne
  • S&P to taste

 Method:

  • Combine cornmeal, flour, garlic powder, thyme, cayenne, S&P in a shallow dish. Using a fork, mix well
  • Pour buttermilk/hot sauce, S&P mix into another shallow dish
  • Dip tomato slices in buttermilk mix, then into cornmeal-flour mix
  • Make sure slices are well coated
  • Fry until golden, about 3-4 minutes per side
  • Do not crowd the pan
  • Drain on paper towels
  • Serve with more hot sauce on the side

Leave a comment »

Sweet Treats

cookieThere’s been a happy confluence of events recently; my foodie stars are aligned.

Connie was in touch earlier this month to remind me of fun we’d had a few years back baking cookies (and drinking wine) with two other friends. We’d spent an entire afternoon covered in flour, crunching egg shells on her floor, gossiping and getting sillier as the day wore on. We shared our recipes, turned out dozens of sweet goodies and divided up the spoils before going home.

Did I want to do it again this year? Of course!

This week I find myself in Maine visiting Best Friend whose lovely home includes a chilly attic with a treasure trove of books left by the former owner. I have an affinity for books; especially old books with yellowed pages and antiquated language. Best Friend’s attic holds hundreds of those tomes and many are for the cook. With cookie cooking coming up, this visit’s attic search was focused on finding cookery books about sweets. And, what a sweet I found! “Desserts in America, 1650-1900.”

I dug in. I started to read.

The cookie, A cookie. What is a cookie? Where did they come from? The earliest form of this favorite sweet is found in Persia around the 7th century where sugar was also first used. Not as sweet then as they are today, they traveled well and the concept spread. Muslims brought cookies to Spain and by the 14th Century forms of cookies were common all over Europe. Centuries later the cookie came to America compliments of the Dutch. Originally called koekje or little cakes, koekje was Anglicized to cookie. By the 1800’s cookies were a New Year’s Day specialty and tradition required families to provide one for a visitor to carry away in his pocket.

From America’s earliest days, there is no doubt that the cookie was widely enjoyed. Few American homes were without cookie making tools that included a rolling pin (called a molding pin), a plain board (called a molding board) a wineglass, tumbler or flour-dredging box for cutting the dough into discs. Tin cutters in the shape of animals, stars, crescents and leaves were also commonly found.

There is also no doubt that the simple Dutch koekje had spun off into recipes for hundreds of little sweet treats. By the 19th Century, all Cookery Books featured at least a few receipts for cookies. According to my newly found book which quotes a New York hostess, “Cookies are proper for tea or for putting upon a salver to eat with jellies.” The lady goes on to describe the receipt for one of her favorites, a fragile cylinder to be served plain or filled with cream:

“The housewife will beat equal parts of cream, sugar, flour and orange water together for half an hour. Then pour a spoonful onto a very hot wafer iron and baked it for a mere minute until it was light brown. While the wafer was hot she was rolled it around a wooden roller or the handle of a wooden spoon and let it cool until crisp.”

The Naples biscuit was another early American sweet; it is the fore runner of our modern graham cracker. It was enjoyed by itself and used for thickening possets (sweet spiced hot milk curdled with ale or beer). These little cookies were baked in small tins and I read George Washington owned four (tins, that is).

Most early American cookies, then commonly called little flat cakes or drop cakes, almost always were flavored, instead of with vanilla, with rose or orange-flower water. More commonly than not, they would contain seeds, sometimes whole, sometimes ground by a mortar and a pestle. Cardamom, cinnamon and caraway were the flavors most used; sugar was often sprinkled on the top. All were baked in a “quick” but not too hot oven with several sheets of paper under the baking sweet dough.

When I pack my bag to come back home, my new Book Friend will come along. I can not wait to bake some of those old fashioned delights.

___________________________________________________________________________

I love marzipan; I also love the memories it holds. My little girl birthday cakes were always decorated with butter cream flowers filled with marzipan and during the spring Nana brought us sugared marzipan candies from Dubin’s, a favorite bakery in Brooklyn.

Ratafia Cakes (cookies) are made from almond paste, the essential ingredient for marchpane, marzipan. The book flopped open to that page when I first picked it up. It will be the first recipe I’ll try.

Untested Recipes for Ratafia Cakes (cookies)

Mix thoroughly:

  • 7 ounces almond paste
  • 7/8 cup sugar
  • 2 egg whites
  • 1 tsp almond extract

Form this mixture into 1” ovals. Place on a cookie sheet lined with parchment paper. Bake at 325° for 15 minutes.

–OR—

Beat

  • 3 egg whites until just stiff

Add:

  • 1 cup sugar
  • 2 TBS rosewater
  • 1 cup of almond paste
  • ½ tsp almond extract

Fold In:

  • 2 cups of sifted flour

Drop by teaspoon onto a well greased cookie sheet. Bake at 325° for 10 minutes.

Comments (2) »

The First Classic French Recipe I Learned to Cook Very Well

pouring-chardonnayJulia Child for me, like so many, many others, provided my first peek into “How It’s Supposed To Be Done”, cooking that is. Her original Mastering the Art of French Cooking was the second cookbook I ever owned and it remains one of my favorites. I still have my original copy—dog eared and stained—and her recipes offer the best guidance for a new cook (which I was back in the day) and timeless recipes and techniques for the cook with more experience (which I like to think I’ve become).
Coq au Vin , chicken simmered in wine, was the first thing I tried from that book and wow, did I love it. I followed the recipe to a “T”. Over the years, as my confidence grew, I decided to make a few changes, especially after finding a very old recipe in Larousse Gastronomique. The result is an amalgam of two very fine worlds and remains, I think, an excellent dish.

For context, a word about Larousse: (I know you know about Julia) I consider it the Bible of Cooking. It is set up alphabetically and contains the most complete compendium of (mostly French) cooking terms and techniques and original recipes that I have ever seen. It was first published in 1938. It is said Escoffier collaborated with the author.

And, for added context, some history about Coq au Vin:  Coq is the French word for cock and it is rumored that this dish was originally made with the old rooster who no longer did his duty. Wine was added to tenderize the old guy and it simmered all day while the Farmer and His Wife worked in the fields. Nowadays, even Larousse admits, the stew should be “prepared with a fine young chicken”.

Back to the pot and now, the first ingredient, my favorite, the wine. Julia gives the cook a choice of red or white although she offers that the red is more common. Larousse goes a bit further, gets more specific and instructs the cook to use an “old Auvergne wine”, a little known area in central France growing ancient vines surrounded by extinct volcanoes. Auvergne produces reds (Gamay and Pinot Noir), whites (Chardonnay) and Rose, so the cook still has a choice. (Determined to cook with a vin that was classic for the dish, I once went on a fruitless search all over NY City looking for a bottle of wine from Auvergne). The bottom line is you should use what you prefer; I’ve grown to prefer a white just because the look of chicken tinted by red simply does not appeal. Beaujolais is a region near Auvergne and is an excellent wine alternative. The wines are fruity and light and I’ve seen several fine cooks choose a vin with that label and produce an excellent stew.

Mushrooms are another ingredient where Julia and Larousse do not agree.  Julia just says “mushrooms” and I was originally taught to use button (most likely because in this country, in those years, button was all you could find).  With Larousse the mushrooms are morels and I suspect this is more accurate as the farmer’s wife would have scavenged the local wood for whatever she could and morels seem a more likely find.

There is no mention of bacon in my beat up Larousse, rather 3 ounces of lean pork cut into dice. Julia calls for lean bacon, cut into lardons (small sticks) and given a blanch (quick cook in lightly boiling water). That is still what I prefer to do. The quick hot bath tamps down the bacon flavor, makes it nice and mild so it does not over power the stew.

Bouquet Garni provides the next divergence of opinion; Larousse takes this win. Defined by that book simply as a tied bundle of fresh herbs removed after cooking, I use fresh thyme, fresh parsley and a bay leaf. Julia calls for dried herbs that go in, stay in and doesn’t use parsley until it is time for a garnish.

Beurre manie, blended butter and flour, shows up with Julia, is not preferred in Larousse. Instead the cook is told to thicken the sauce “with the blood of the chicken mixed with the pounded liver and some brandy”. I passed on that and stayed with the butter; besides, Larousse does write,  “lacking the blood, the sauce may be thickened with kneaded butter” which I assumed was  the beurre manie.

Here is my version of Classic Coq au Vin

Before you begin, please read through this carefully and try to familiarize yourself with the steps. Actually, that should be done anytime you cook.

Then prepare your mis en place(meaning everything in its place) : cut, chop and pre-measure everything you can. Arrange your ingredients in the order they will be used. Get out and set up all the equipment you will need, in the order you will need it. Tape the recipe to a cabinet door close to the stove. These steps will make the cooking a lot easier and the process a whole lot smoother. (Do not forget a glass for the cook with a little extra wine).

  • 1 fresh chicken, 3-4 pounds, cut into 6 pieces, washed and patted dry
  • 4 ounces of lean slab bacon, rind removed, cut into lardoons, sticks about 1” x 1/4 “
  • 2 TBS sweet butter + another 1 ½ TBS sweet butter + another separate 2 TBS sweet butter
  • 1 ½ TBS vegetable oil + another 1 TBS vegetable oil
  • S&P to taste
  • ¼ cup of cognac
  • 1 bottle of  very good chardonnay (if you can’t drink it, don’t cook with it)
  • 1-2 cups of brown chicken stock (chicken parts, bones and the veg are browned in a pan or the oven before added to water and simmered)
  • Another ½ cup of brown chicken stock
  • 2 medium cloves of garlic, mashed to a paste
  • 2 Bouquet garni: 1 with 2 sprigs of fresh flat leaf parsley, 3 springs of fresh thyme, 1 bay leaf, tied together with string and another bouquet garni with 1 sprig of parsley, 2 sprigs of thyme and a small bay leaf tied together with string
  • ½ TBS tomato paste
  • 12 small white onions (try to find fresh) blanched, peeled and patted dry. Leave the stem end intact so the onions won’t come apart. Remove and discard the root end.
  • ½ pound of morels
  • Beurre manie: 3 TBS flour mashed with 2 TBS softened sweet butter
  • 2-3 TBS fresh flat leaf parsley, chopped for garnish

Method: (Use a heavy Dutch oven with a tight fitting lid)

  • Over medium heat, sauté the blanched lardons in 2 TBS of butter until lightly browned. Remove the lardons, drain and set aside
  • In the same pot, brown the chicken, do not crowd them, do a few at a time if necessary, season with S&P, return the lardons to the pot, cover and cook over low heat for 10 minutes.
  • Remove the pot with the chicken away from the heat and pour in the warmed cognac. Quickly, carefully ignite the cognac and shake the pot until the flames die down.
  • Return the pot to the heat, turn the heat to medium high. Pour in the wine and enough stock to just cover the chicken. Stir in the garlic and tomato paste. Add the bouquet garni. Bring the pot to a gentle simmer, cover and cook for 30 minutes. Keep the liquid at a gentle simmer, do not let it boil.
  • While the chicken is simmering cook the mushrooms and the onions.
  • The onions: Melt 1 ½ TBS sweet butter and the same amount of vegetable oil in a heavy duty skillet over medium high heat. When the oil and butter bubble, add the onions, S&P and cook for 10 minutes, shaking the pan occasionally so the onions brown evenly. Add ½ cup brown chicken stock, the second bouquet garni , lower the heat to simmer, cover and cook for 40-50 minutes until the onions are tender but still have their shape. Discard the bouquet garni.
  • The mushrooms: melt 2 TBS butter and 1TBS oil in a heavy skillet over medium high heat. Add the mushrooms, season lightly with S&P, and sauté until lightly browned. 
  • After 30 minutes, remove the chicken from the pot, carefully so it doesn’t fall apart, to a warm platter. Cover loosely and set aside.
  • Simmer the remaining liquid in the casserole for 2 minutes and try to skim and discard any fat that you can. Then raise the heat to high and boil the sauce until about 2-2 ½ cups remain. Remove the bouquet garni, remove the pot from the heat and check the seasonings.
  • Slowly beat the beurre manie, adding a little at a time, into the hot sauce. You should use a heavy whisk for this; you do not want lumps in your sauce. After all the butter and flour are incorporated return the pot to a med heat, bring the sauce to a simmer and stir until the sauce is thick and will coat a spoon: put the spoon in the sauce, remove it, run a finger down the back, there should be a clean space where your finger was and the rest of the spoon should remain coated.
  • Return the chicken to the sauce. Add the onions and mushrooms. Gently, coat every thing with the sauce. The dish will hold like this  for up to one hour. If you are going to wait to serve, take a piece of plastic wrap and press it gently, directly, loosely onto the stew. When you are ready to serve, remove the plastic, reheat the pot, uncovered, carefully over low heat and let the stew simmer gently for 5 minutes or until its hot. Stir carefully.
  • It is traditional to serve directly from the casserole. Garnish with the chopped parley.
  • Serve this marvelous stew with the wine you used for cooking. Julia says boiled parsley potatoes and buttered peas usually accompany it in France. I heartily agree! But do add some crusty bread.


Comments (2) »

Kid Stuff

macMy sons could not be more different. While one was born looking like the ultimate Gerber baby, smiling, pudgy, pink and perfect, the other popped into this world with a permanent scowl, looking like a plucked chicken and sporting a uni-brow that extended into his hairline.

While my little chicken quickly blossomed into beautiful, each child maintained unique from birth eating habits. One Hoovered everything in sight and could not bear to even have the bottle removed so I could jam in a spoon of cereal, the other spit back everything that came near his mouth. As they grew, one continued to try and enjoy different tastes, the other survived childhood on dry tuna, apples, wedges of lettuce and hot dogs. And different foods on the same plate could not touch. Heaven forbid the potato came anywhere near the meat or for that matter, could the meat display any moisture. Pot roast had to be patted dry if he would even consider taking a taste….which he usually did not.

Now, if this child were round and looked like he was well nourished there would not have been any cause for concern. But my little chicken sported a chest where each rib was clearly evident and had arms no thicker than straws. A strong wind could have blown him away. My nickname for him…. “Bird”….was as much for the way he ate as for his size.

Flash forward 40 years and both babies have turned in Handsome Men and all past worries over lack of appetite or spindly appearance have completely disappeared. Bird is now, like his brother, a Hoover, a Good Eater and certainly Not Puny. Bird also now parents Another Bird, a Female Version.

They will be visiting shortly. I have asked for a Preferred Food List. It came today. As this Female Bird is somewhat taller than her Daddy was at the same age, her menu is of course somewhat longer. It does includes tuna. It has bananas, no apples. But I do see a chip off the original Bird Block.

You see, each generation will refine and improve upon the previous generation and Female Bird has done just that. She has taken her Daddy’s preferences and distinctive personality traits to a much higher level. Not only are there specific foods that she will eat, but each food has to be a certain brand and where slicing is involved, thickness (thinness in this case) is also a concern. And, to refine further, within each brand there are a few items with more specific selections: the rolls will have white seeds and the tuna will be solid pack only with water. In addition, parents will be flying in additional snacks from the Traveling Prescribed Food List.

As the Parent of this particular Parent I see this and I smile. I have perspective, I feel nostalgia and it is something I enjoy. It warms my heart. It makes me proud. Who said that when a parent struggles with his child it is retribution for that parent’s struggles with his parents? I heartily disagree. One generation does follow the other, each getting better along the way. What I see  is affirmation, very simple. I’m very sure.

————————————————————————————————————————————————————————

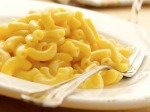
Mac and Cheese was on the Prescribed Food List. However, not this version, which is among my favorites. The evaporated milk makes a creamier, less grainy sauce.

Macaroni and Cheese for 10

Preheat oven to 400°

Butter a shallow 4 quart baking dish

Topping:’

  • 2 TBS sweet butter, melted
  • 1 cup of panko crumbs or coarsely processed white bread crumbs

Sauce:

  • ½ stick unsalted butter
  • 3 TBS all purpose flour
  • 2 ½ cups evaporated milk
  • 3 cups grated white cheddar
  • ½ cup grated Monterrey jack
  • 1 TBS grainy mustard
  • ½ pound elbow macaroni—cook in salted water 2-3 minutes less than the package directions, reserve about ½ cup of pasta water, drain pasta and then return pasta to reserved cooking water.
  • Freshly ground pepper to taste

Method:

  • Toss crumbs and 2 TBS butter together and set aside
  • Melt ½ stick butter over medium heat, add flour and pepper and stir for 1-2 minutes to cook the flour
  • Whisk in the milk and continue whisking until the sauce begins to bubble and is thick
  • Stir in mustard
  • Stir in cheeses until melted, remove from heat
  • Add cooked macaroni and reserved water, stir to combine
  • Pour into prepared dish

Bake for 5 minutes, remove from oven, stir, top with crumbs and bake another 20-25 minutes until golden. Let rest 10 minutes before serving


Comments (1) »